Zombie Titans Titan Builds & Hangar Priorities
Spend scrap where it changes March clear, Surge peel, and Behemoth burn.
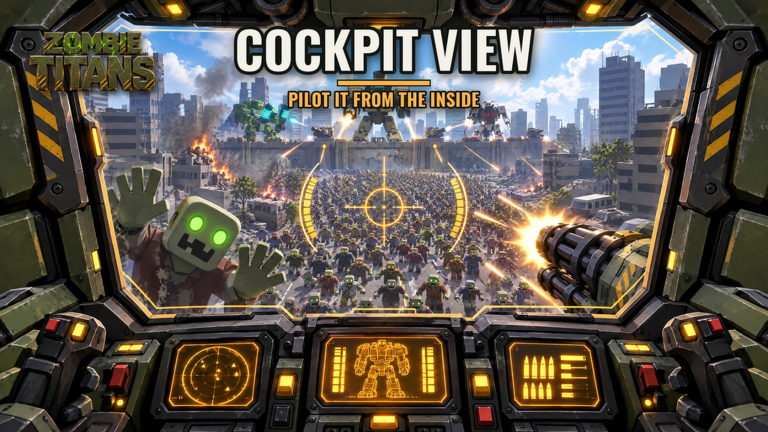
Zombie Titans gives you four mechs and a hangar that turns scrap into real power. Builds are not fashion loadouts — they are upgrade priorities that match siege jobs. This page ranks what to buy first on Bulldog, Volt, Mammoth, and Mantis so your scrap from kills, victories, daily supply drops, and the group bonus actually moves win rate.
Pair this with the titans tier list for meta snapshots, scrap farming for income, and beat the Behemoth for timing. New pilots should still finish Getting Started before min-maxing.
Build philosophy for a wall-defense game
Every upgrade should answer one question: does this help the gate survive March → Surge → Behemoth? If the honest answer is no, it waits.
Universal priority ladder inside any titan:
- Survive long enough to matter — durability and defensive nodes that keep you on the wall.
- Primary fire strength — the weapon you hold for most of the match.
- Signature role ability — the button that defines your job (missiles, EMP, carpet bombs, berserk, and so on).
- Secondary kit tools — useful, but only after the first three stop feeling weak.
- Luxury / comfort — last.
You unlock and upgrade in the hangar, then deploy from the hangar roof. Confirm the correct titan before you drop. Cross-platform lobbies of eight punish specialists who cannot perform their job more than they punish imperfect fashion.
Role map before you spend
Pick a job, then pick upgrades:
- Lane clear flex — Bulldog default home.
- Clump control / flyer peel — Volt default home.
- Heavy artillery / Behemoth anchor — Mammoth default home.
- Priority delete / emergency tempo — Mantis default home.
You can flex across jobs, but your first 1,000 group scrap and early dailies should not try to be all four at once.
Bulldog build priorities
Kit: twin gatlings, rocket pods, swarm missiles, ground slam.
Bulldog is the reliable all-rounder. It clears March cleanly, helps Surge with missiles, and can still contribute meaningful Behemoth chip.
Hangar order
- Gatling effectiveness — your uptime weapon. If trash reaches the wall because primaries feel soft, fix this first.
- Survivability — Bulldog players stand on the line; dead flexes create flyer holes.
- Rocket pods / swarm missiles — Surge density and flyer cluster tools. Upgrade the missile path you actually press under pressure.
- Ground slam — wall-breach answer. Important, but less constant than guns and rockets.
Play pattern the build supports
Hold gatlings on wall touches, dump rockets when Surge clumps, slam when melee leaks reach you, then help Behemoth burn once peel is stable. Cockpit toggle helps missile leads on Gasbags and Carriers — practice it on the controls guide.
When to choose Bulldog as main
Choose Bulldog if you want one titan that never feels useless. It is the safest home for the group 1,000 scrap bonus when you are unsure which specialist you enjoy.
Volt build priorities
Kit: chain-lightning arc gun, lightning strikes, Tesla field, EMP pulse.
Volt exists to punish packs and stabilize air-heavy Surges.
Hangar order
- Arc gun / lightning damage — continuous contribution while you wait for big cooldowns.
- Tesla field strength / uptime — space denial near the wall during Surge.
- EMP pulse — high-impact peel button when flyer packs demand an interrupt window for the burn team.
- Lightning strikes — burst for clumps; upgrade alongside your primary path rather than ignoring core gun feel.
- Survivability — still mandatory; peel pilots who die early leave Carriers free.
Play pattern the build supports
Stand where you can see both wall leaks and flyer corridors. Use Tesla to shape space, EMP when the squad needs a hard reset, and keep arc fire running so you are never “waiting only.” Volt shines in coordinated calls from the Behemoth guide.
When to choose Volt as main
Choose Volt if your lobbies die to air more than to raw Behemoth HP. A strong Volt often raises party victory rate — and victory scrap — more than a selfish damage stack.
Mammoth build priorities
Kit: siege cannon, mortar barrages, carpet bombs, siege ram.
Mammoth is the heavy. It wants scrap invested into artillery that matters on Behemoth marks.
Hangar order
- Siege cannon — baseline heavy damage you can fire without drama.
- Mortar barrages / carpet bombs — Surge zone control and Behemoth burn windows. These are your identity; fund them early.
- Survivability — artillery that dies mid-bomb helps nobody.
- Siege ram — breakthrough and close answer; valuable, but timed less often than cannon and bombs.
Play pattern the build supports
Save bombs for Surge threats that endanger the gate and for called Behemoth burns. Announce if your carpet is down. Use cockpit for precision on the boss, third-person when you must watch a second lane. Do not spend March practicing carpet on empty dirt.
When to choose Mammoth as main
Choose Mammoth if you like being the burn anchor and your hangar scrap can support heavy nodes. In thin lobbies, Mammoth still needs someone else on peel — builds do not replace roles.
Mantis build priorities
Kit: twin scythes, blade dashes, leap strikes, berserk.
Mantis is mobility and violence. Upgrades should make dashes trustworthy and berserk decisive.
Hangar order
- Survivability / melee sustain — you will be closer to danger than Mammoth.
- Scythe damage — your constant clear tool between dashes.
- Blade dashes / leap strikes — priority delete mobility. If dashes feel weak, Mantis loses its job.
- Berserk — emergency tempo and finish windows. Fund it once basic mobility works.
Play pattern the build supports
Dash to delete the threat that would cancel a teammate’s burn, leap to re-angle, berserk when the gate needs a swing. Mantis can dump into Behemoth, but many wins come from cleaning Carrier disasters first. Do not interpret mobility as permission to abandon the wall for highlight clips.
When to choose Mantis as main
Choose Mantis if you read the field quickly and enjoy peel-carry fantasy. Newer pilots who overchase may prefer Bulldog until controls and wall discipline click.
Scrap allocation across titans
A practical account plan:
- Phase A: All early scrap (including daily supply and the one-time 1,000 group bonus) into one main using the orders above.
- Phase B: Build a flex that covers the main’s hole (Volt if you main Mammoth; Mammoth if you main Mantis; and so on).
- Phase C: Sprinkle remaining titans only after two kits can clear Surge with confidence.
This matches the spend framework in scrap farming and prevents four weak frames.
Synergy in an eight-player lobby
Ideal mixed hangars look like:
- At least one Volt or Bulldog comfortable on air.
- At least one Mammoth or heavy-capable Bulldog for Behemoth.
- A Mantis or second flex for emergencies.
If your public lobby stacks four Mantis and no peel plan, swap to the missing job even if your personal “favorite build” is complete. The gate is the win condition, not your identity.
Hangar routine before deploy
- Claim dailies / check codes.
- Apply the next planned upgrade — one node with purpose.
- Confirm ability icons match the role you intend.
- Deploy from the hangar roof with wall orientation ready.
- After the match, ask whether the upgrade was noticeable; if not, redirect next scrap.
Common build mistakes
- Spreading scrap evenly “to be fair” to every titan.
- Maxing a flashy ultimate-style node while primaries still tickle.
- Ignoring survivability because damage numbers are prettier.
- Copying a tier-list favorite without owning the role in Surge.
- Refusing to swap when the lobby composition is broken.
Avoid those and your hangar becomes a win-rate machine.
Where builds meet the rest of the wiki
- Meta ranks: tier list hub and titans tier list.
- Boss timing: beat Behemoth.
- Economy: scrap farming.
- Inputs: controls.
- Onboarding: Getting Started.
- Patch watch: updates / launch notes.
- Site map: wiki and Guides Hub.
Upgrade with intent, deploy with a job, and let scrap follow victories. That is a Zombie Titans build — measured in gates saved, not in unlocked icons alone.
Frequently Asked Questions
Quick answers for Zombie Titans pilots.
Which titan should I upgrade first?
Upgrade the titan you actually deploy for serious holds. Bulldog is the safest flexible starter; pick Volt, Mammoth, or Mantis first if that kit already matches how you play.
What hangar upgrades matter most?
Survivability, primary fire strength, and the signature ability for your role. Luxury nodes wait until Surge and Behemoth stops feeling soft.
Should I unlock all four titans early?
Not before one main and one flex are competent. Spreading scrap across four weak kits slows Behemoth progress.
How do builds change for Behemoth?
Mammoth leans into cannon and bombs for burn. Volt and Bulldog fund peel tools. Mantis funds dashes and berserk for emergency deletes. Assign jobs before the boss spawns.
Where does the 1,000 group scrap go?
Into your main titan’s core hangar path — usually survivability plus primary or signature ability — not into random alt unlocks.